
Now that our little one has turned one(!), I've had plenty of time to use all the items in our nursery. Many soon-to-be new mothers ask me what the must-haves are for your first baby. Each baby is different. Here is my list of nursery essentials (in no particular order) that helped us through baby Alexander's first year - plus, I've indicated if an item is worth a splurge, or if it's a good place to save.
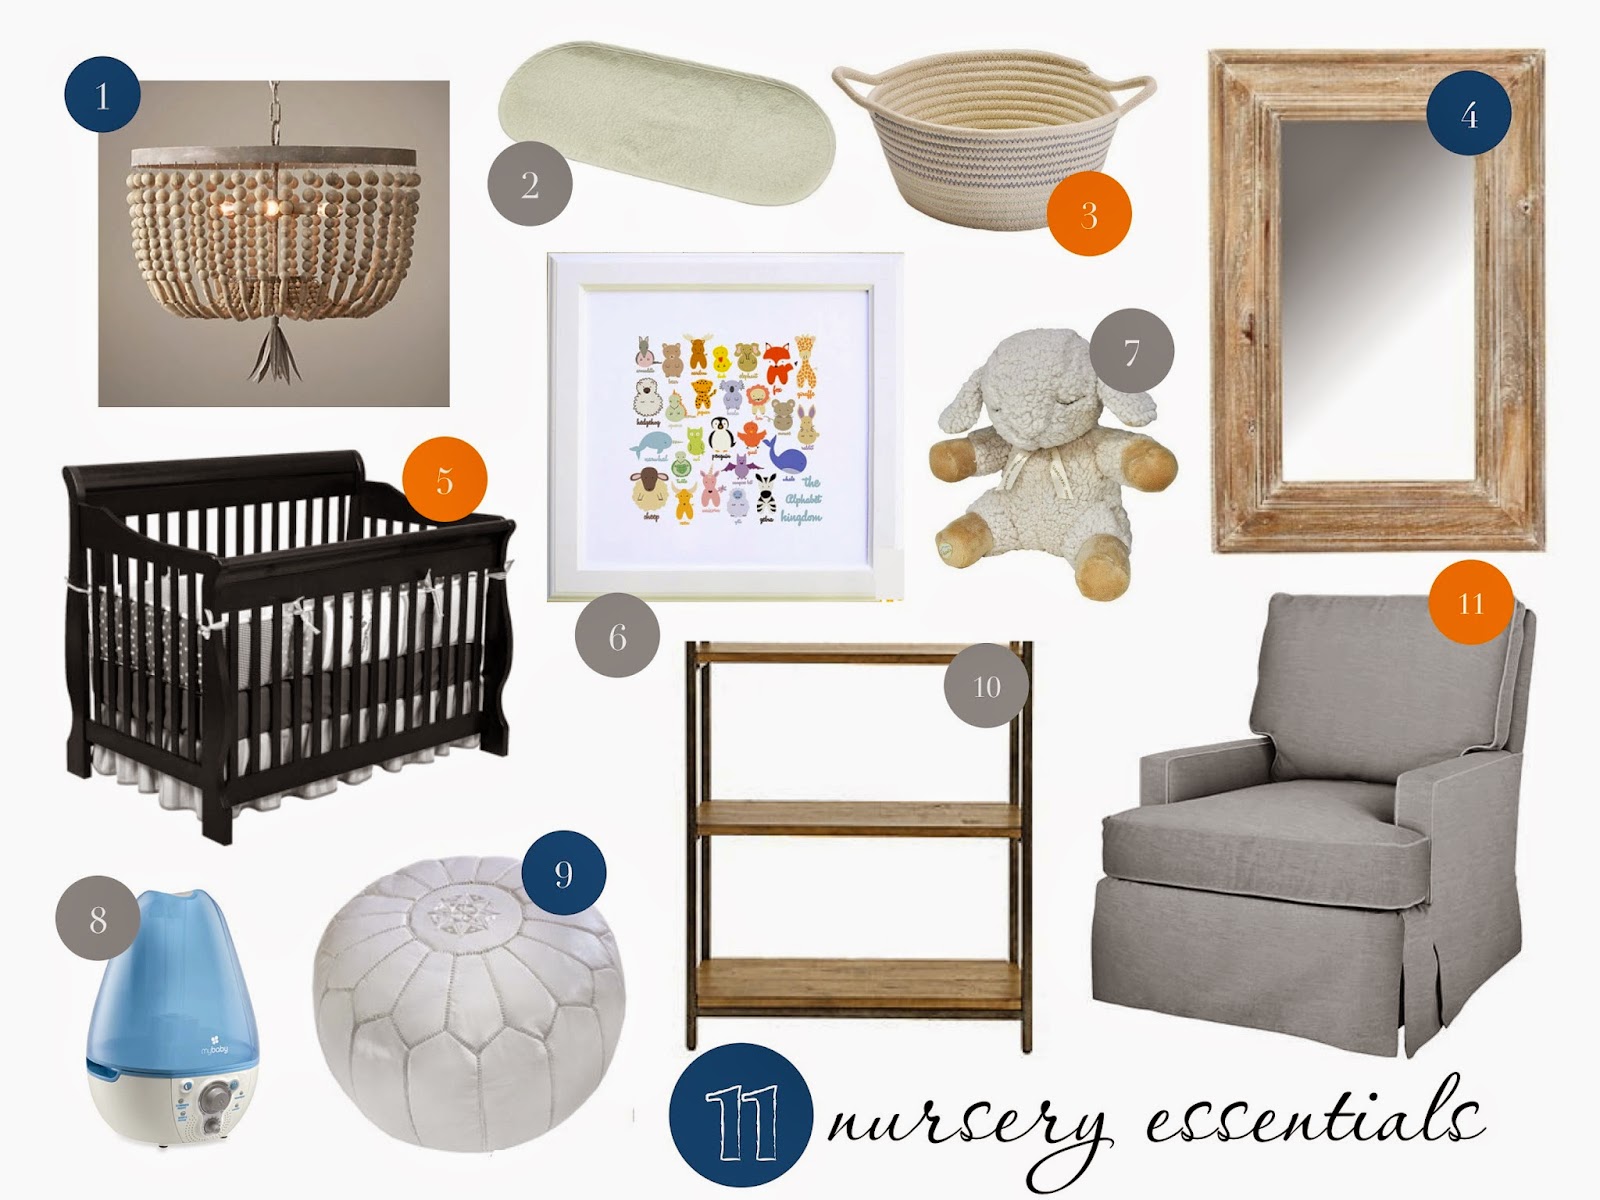
1. Dimmer or Nightlight (lighting here)
It's no secret that babies and toddlers like night lights, but what I didn't expect, was how convenient it would be for us. We installed a dimmer switch for our overhead fixture and keep it on low during the night. Our little guy loves it and it helps us see what we're doing without waking him up.
2. Changing Pad Liners
A friend told me about these a few weeks before baby A was born. I'm SO glad I took her advice and grabbed some. You can't imagine how many times baby will soil the changing pad. These little liners go on top of the changing pad cover and can go straight in the hamper to be cleaned with the laundry. I purchased 2 different brands. The Boppy set held up well and is still going strong, despite countless trips through the wash. The Munchkin set got limp in the wash and just didn't work for a wiggly baby.
3. Diaper Caddy - place to save
There are some fancy little diaper caddies available to match all kinds of decor styles. They usually have compartments to hold diapers, wipes and lotions. I used a basket that we already had and it does the trick perfectly. It keeps diapers, creams and lotions, hand sanitizer, a thermometer, and a few toys all within reach. There isn't room for the wipes, but they sit right beside the basket, along with a tissue box. I also recommend keeping some toys handy on the changing table. Our little one will not sit still for a diaper change and toys give me precious seconds to clean him up before he runs away!
4. Mirror
Our nursery was formerly the guest room and we decided to keep the floor mirror in there. Even early on, Alex loved looking at himself and as he's grown his delight in his reflection only increases. A crib mirror with lights and sound was also a great way to keep him occupied before he was mobile. Note: If using a floor mirror, secure it to the wall to avoid accidental tipping over!!
5. Crib - place to save
This was a hard place for me to save because the crib feels like the central element to the nursery design. Although I was dreaming about this fabulous Restoration Hardware crib, I knew baby would grow out of a single-function crib quickly. I chose a convertible crib that can be changed into a toddler bed, daybed and finally a full-size bed. This crib has held up so well despite all the toys Baby A manages to ram into it, I know we'll get use out of it for many years.
6. Artwork
Baby A just LOVES looking at artwork. This colorful alphabet print hangs over his changing table and keeps his attention. When he was colicky, singing the ABC's and pointing to the animals worked like magic to calm him down. I found that really any artwork or photography hanging around the house seems to fascinate him. As he's grown older, he loves pointing and learning about each one.
7. Sound machine
Our little guy was very colicky for the first 5 months and hated sleeping and napping. For us, the only thing that seemed to work was white noise. This little sleep sheep was great to attach to the carseat or stroller to help baby nap away from home. It only stays on for 45 minutes, so we use our humidifier (below) for continuous sound in the nursery.
8. Humidifier
We live in Colorado, so we have a humidifier system that runs through our HVAC system. But even that didn't seem to be enough for the nursery. We love this humidifier because it's uses cool mist, has a night light, and sound machine built in. Baby A just loves the "summer night" sounds.
9. Ottoman - place to save (splurge option here)
I didn't have an ottoman when baby A was born, but it was one of the first things I bought. Late night feedings are exhausting and any way to make it more comfortable is essential. I chose a leather pouf because it's easy to clean and was affordable when compared to the matching ottoman for our glider.
10. Side Table - place to save (splurge option here)
You don't need anything fancy, but you will want a surface near your chair that you can reach without getting up. We have a smaller nursery, so I needed dual-purpose items and used a bookshelf for my side table. I keep the second shelf relatively clear for my nursing and nighttime essentials - book, water glass, tissues and phone. The other shelves are used for books, decorations, storage boxes and baskets.
11. Glider or Rocker - worth the splurge!
You will be spending so much time sitting and holding your little one. A quality glider or rocker is essential. You want something that is comfortable but isn't going to break down and sink after hours of use. Baby only gets heavier and you don't want to have to heave yourself out of a broken down chair. I would also recommend something with a fabric that can be cleaned or hides stains well. From spit-up, to little toddler hands, your chair will get dirty!

1. Dimmer or Nightlight (lighting here)
It's no secret that babies and toddlers like night lights, but what I didn't expect, was how convenient it would be for us. We installed a dimmer switch for our overhead fixture and keep it on low during the night. Our little guy loves it and it helps us see what we're doing without waking him up.
2. Changing Pad Liners
A friend told me about these a few weeks before baby A was born. I'm SO glad I took her advice and grabbed some. You can't imagine how many times baby will soil the changing pad. These little liners go on top of the changing pad cover and can go straight in the hamper to be cleaned with the laundry. I purchased 2 different brands. The Boppy set held up well and is still going strong, despite countless trips through the wash. The Munchkin set got limp in the wash and just didn't work for a wiggly baby.
3. Diaper Caddy - place to save
There are some fancy little diaper caddies available to match all kinds of decor styles. They usually have compartments to hold diapers, wipes and lotions. I used a basket that we already had and it does the trick perfectly. It keeps diapers, creams and lotions, hand sanitizer, a thermometer, and a few toys all within reach. There isn't room for the wipes, but they sit right beside the basket, along with a tissue box. I also recommend keeping some toys handy on the changing table. Our little one will not sit still for a diaper change and toys give me precious seconds to clean him up before he runs away!
4. Mirror
Our nursery was formerly the guest room and we decided to keep the floor mirror in there. Even early on, Alex loved looking at himself and as he's grown his delight in his reflection only increases. A crib mirror with lights and sound was also a great way to keep him occupied before he was mobile. Note: If using a floor mirror, secure it to the wall to avoid accidental tipping over!!
5. Crib - place to save
This was a hard place for me to save because the crib feels like the central element to the nursery design. Although I was dreaming about this fabulous Restoration Hardware crib, I knew baby would grow out of a single-function crib quickly. I chose a convertible crib that can be changed into a toddler bed, daybed and finally a full-size bed. This crib has held up so well despite all the toys Baby A manages to ram into it, I know we'll get use out of it for many years.
6. Artwork
Baby A just LOVES looking at artwork. This colorful alphabet print hangs over his changing table and keeps his attention. When he was colicky, singing the ABC's and pointing to the animals worked like magic to calm him down. I found that really any artwork or photography hanging around the house seems to fascinate him. As he's grown older, he loves pointing and learning about each one.
7. Sound machine
Our little guy was very colicky for the first 5 months and hated sleeping and napping. For us, the only thing that seemed to work was white noise. This little sleep sheep was great to attach to the carseat or stroller to help baby nap away from home. It only stays on for 45 minutes, so we use our humidifier (below) for continuous sound in the nursery.
8. Humidifier
We live in Colorado, so we have a humidifier system that runs through our HVAC system. But even that didn't seem to be enough for the nursery. We love this humidifier because it's uses cool mist, has a night light, and sound machine built in. Baby A just loves the "summer night" sounds.
9. Ottoman - place to save (splurge option here)
I didn't have an ottoman when baby A was born, but it was one of the first things I bought. Late night feedings are exhausting and any way to make it more comfortable is essential. I chose a leather pouf because it's easy to clean and was affordable when compared to the matching ottoman for our glider.
10. Side Table - place to save (splurge option here)
You don't need anything fancy, but you will want a surface near your chair that you can reach without getting up. We have a smaller nursery, so I needed dual-purpose items and used a bookshelf for my side table. I keep the second shelf relatively clear for my nursing and nighttime essentials - book, water glass, tissues and phone. The other shelves are used for books, decorations, storage boxes and baskets.
11. Glider or Rocker - worth the splurge!
You will be spending so much time sitting and holding your little one. A quality glider or rocker is essential. You want something that is comfortable but isn't going to break down and sink after hours of use. Baby only gets heavier and you don't want to have to heave yourself out of a broken down chair. I would also recommend something with a fabric that can be cleaned or hides stains well. From spit-up, to little toddler hands, your chair will get dirty!


